As you start working on complicated illustrations, layers will start to build up. And you will have to group and arrange them so that you can move and edit the layers easily. I will show you an example of an illustration I did so that you can see how I name and group my layers.
Layers Palette
You can access your Layers Palette from Window>Layers. As you can see below, I have grouped my objects into 6 different layers. You can see the stacking order with the background at the bottom and towel at the top for my illustration. Below is a list of layer settings and their uses.
Visibility Icon: Click to hide/unhide layer
Lock Icon: Click the lock to lock the layer
Layer Name: Double click to rename it
Target Indicator: Click to select layer
Delete Layer: Click to delete layer
New Layer: Add new layer on top
New Sublayer: Add new sublayer under Layer 1

Arranging Objects
To bring a layer on top, select the layer and drag it to the top. Now the flower is at the top layer and covers the whole picture.

Grouping Objects
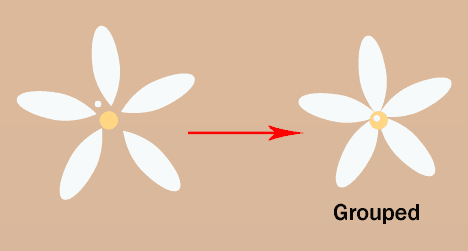
By grouping objects, you can move them together rather than spend time selecting all the objects individually. Here is an example of a flower made up of 6 layers. By selecting my object and grouping them by pressing Ctrl/Command+G, I am able to group them together and move. To edit the grouped object, double click to go into isolation mode to edit the objects. If you want to ungroup them, press Ctrl+Shift+G/Command+Shift+G.

Next, I duplicate a few more of my grouped flower and group them again to form my flower layer.

Appearance Palette
The Appearance Palette shows what effect is applied to a layer. You can Add New Fill or Add New Stroke to the whole layer or individual objects. Go Windows>Appearance to open up your Appearance Palette. Let’s see how it looks when we apply a new fill. Click the option icon and choose Add New Fill.

After we set the Fill with pink color, it turns the whole layer to pink.

Next Lesson: Transparency & Graphic Styles »
Back to Illustrator Training Course


very nice show and easily , it’s make me use allmost of tools and made beauty shapes
thank u
i am so happy to learn illustrator in 30 days that i can not explan thanks
Day11: Nicely presented and easy to follow lesson on layers and such. I found this pretty easy and straight forward with no confusing bits. I just hope the remaining lessons are similar in complexity – although I doubt it – especially as we dig deeper into the program. There has to be some fancy things one can do to make the more intricate designs and I’m certain they will be tricky – but we will see. Day12 – here I come.
Thank you for the sound critique. Me and this neighbour were just preparing to complete some research about this. I am very able to see such good information being shared freely out there.
hard at first until you get compterable with teh program
VERY GOOD TUTORIALS! Thank you! Is editing objects , layers and groups part finished? Becouse it looks like there is something missing, i’d like to know what to do next with all my flowers tuirned pink?
Really nice tutorials!
Easy to understand.
It’s helps me lot! Really!:)
Thank you very much!
yeo i was never good at school but I’m rich bra bra i with the money team
i think antonio is the cutess kid xoxoxo
Hmm nice its very important to group when you are working on multiple layers…